Tracking button clicks with Google Tag Manager is a great way to monitor conversion events on your website that you can tie back to your campaign activity. With Google Tag Manager and Google Analytics, we can set up a number of conversion events.
We recently set up Google Tag Manager for our client Adventurer’s Loot, we wanted to see what the add to cart abandonment rate was. Yes, there are a couple of ways that this can be achieved, GTM being one of them.
The solution: Track ‘Add To Cart’ (button clicks) with Google Tag Manager (GTM).
Create your GTM Account
Log into your Google Account and then head over to Google Tag Manager to create your GTM Account.
Install your GTM Pixel
For WordPress, we recommend using the plugin Google Tag Manager for WordPress, installing the GTM pixels on your website is quite simple and will be the only time you need backend access. Simply add your GTM ID and select your container code placement, we always use the Codeless Injection which is in ‘beta’, and we’ve never had an issue with it.![]()
![]()
Variables
Variables are the built-in events that you can select to track in GTM. They include Errors, Pages, Forms, Clicks etc. Before we begin, it’s good to check to see if the click variables are selected as an option for your trigger. Click on Variables > Configure > Then select all of the elements under Clicks. As you click them, you should see them adding to the Built-In variables.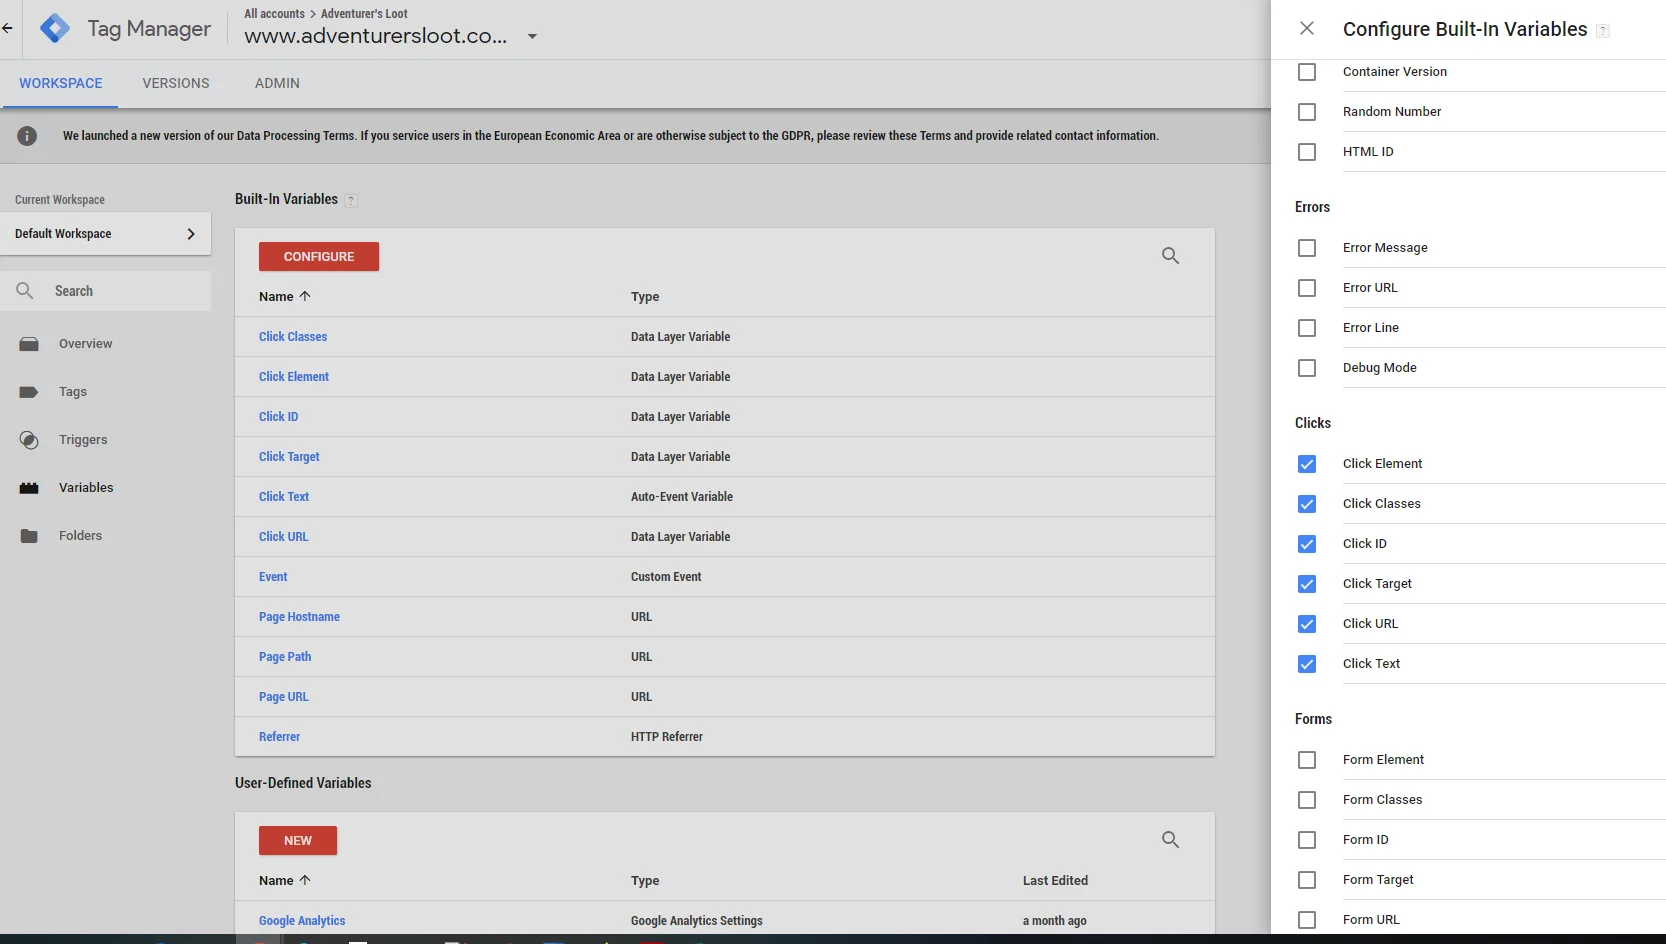

Create Your Click Trigger
The first step is to create a test Click Trigger so in GTM, go to ‘Triggers > New’.
Create a trigger called Test Click Trigger:


Click on the Trigger Configuration box > select All Elements under Click > select All Clicks.
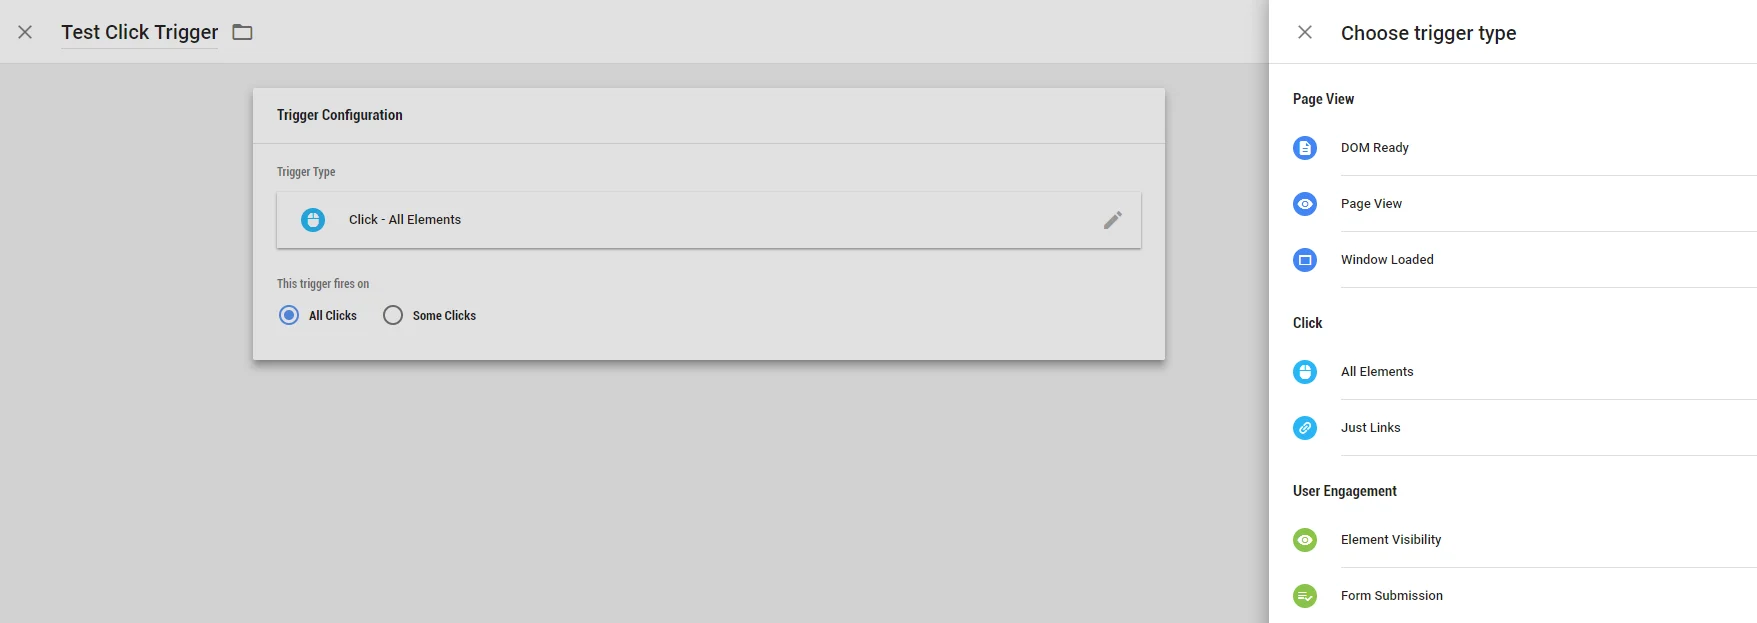

Now click save (top right) and we’ll go and create the filters on our buttons.
Create a Click Filter
Back on the workspace screen, look in the top right and you’ll see a button called “preview”. Click that and then open a new tab on your browser.
In the new tab, open the page you’re looking at i.e. www.adventurersloot.com.au and you’ll now see the GTM console at the bottom of the screen. At the bottom of the summary are the tags that were fired and not fired, on the left is the summary navigation options.
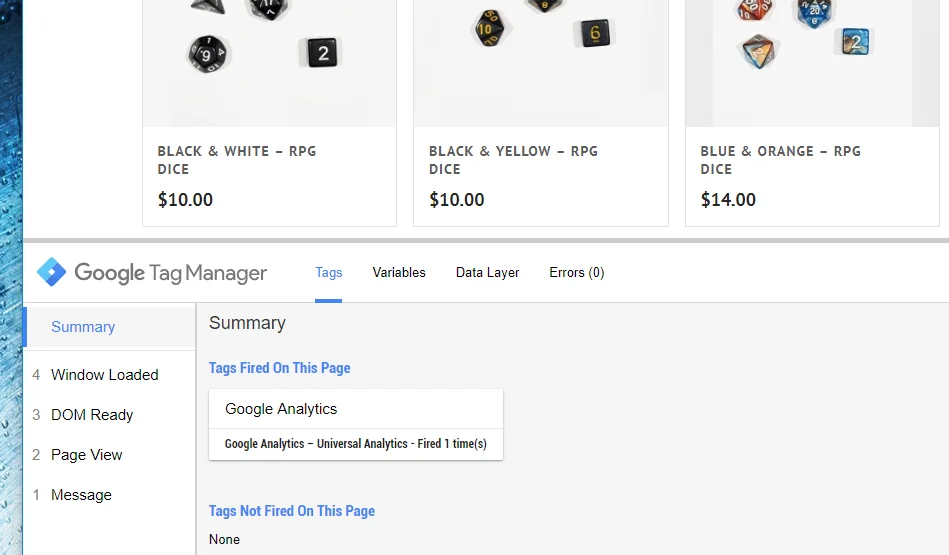

When you are ready to click the button that you want to track, hold down your keyboard’s CONTROL button (COMMAND if its a Mac) and click the button. The CONTROL key opens the link in a new tab.
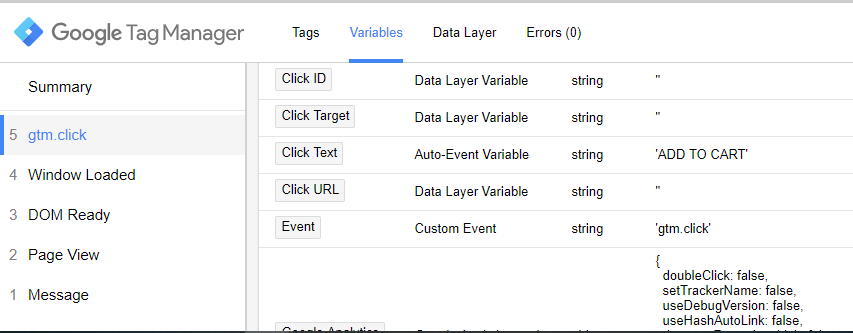
In your original tab, the Summary should have new elements. In this example, it is gtm.click #5.
To tell which new element was triggered by your button click, click on the Variables tab to see the one for your button. We can tell gtm.click #5 is the correct one because the “Click Text” is ADD TO CART, which matches the button. In a nutshell, these variables are associated with your button. Now, we want to filter our Test Click Trigger using these variables.

Configure Your Trigger
Back in your GTM tab, go to Triggers > click on your Test Click Trigger. Re-name it to what you want to track. I titled mine “Add To Cart Click Trigger”
Under Trigger Configuration, change All Clicks to Some Clicks. Then when it comes to the dropdown bar, I’m choosing Click Text and pasting the Click Text that the Variables box gave me:
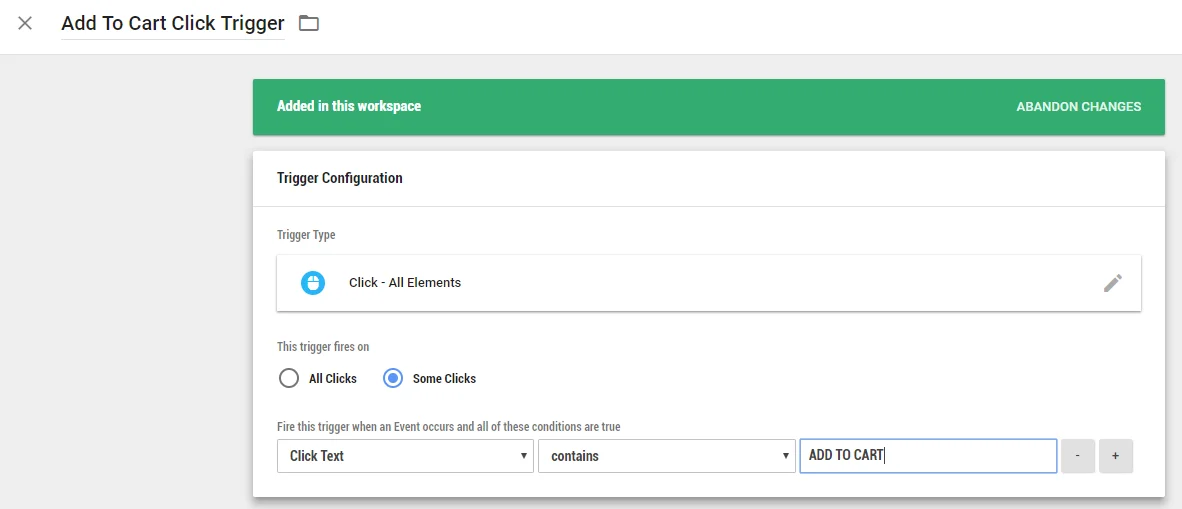

If you don’t have anything for Click Text, you can also use Click Classes and copy the appropriate value.
Creating The Tracking Event
To create the tracking tag for the event we need to set it up so go to Tags > click New.
Create a name for your tag, we called this one “GA – Event – AL -Add To Cart”
Click on the Tag Configuration box > your Tag Type should be Universal Analytics.
Set the Track Type to Event.
Then set your event tags. What events do you want to fire off when someone clicks the button?
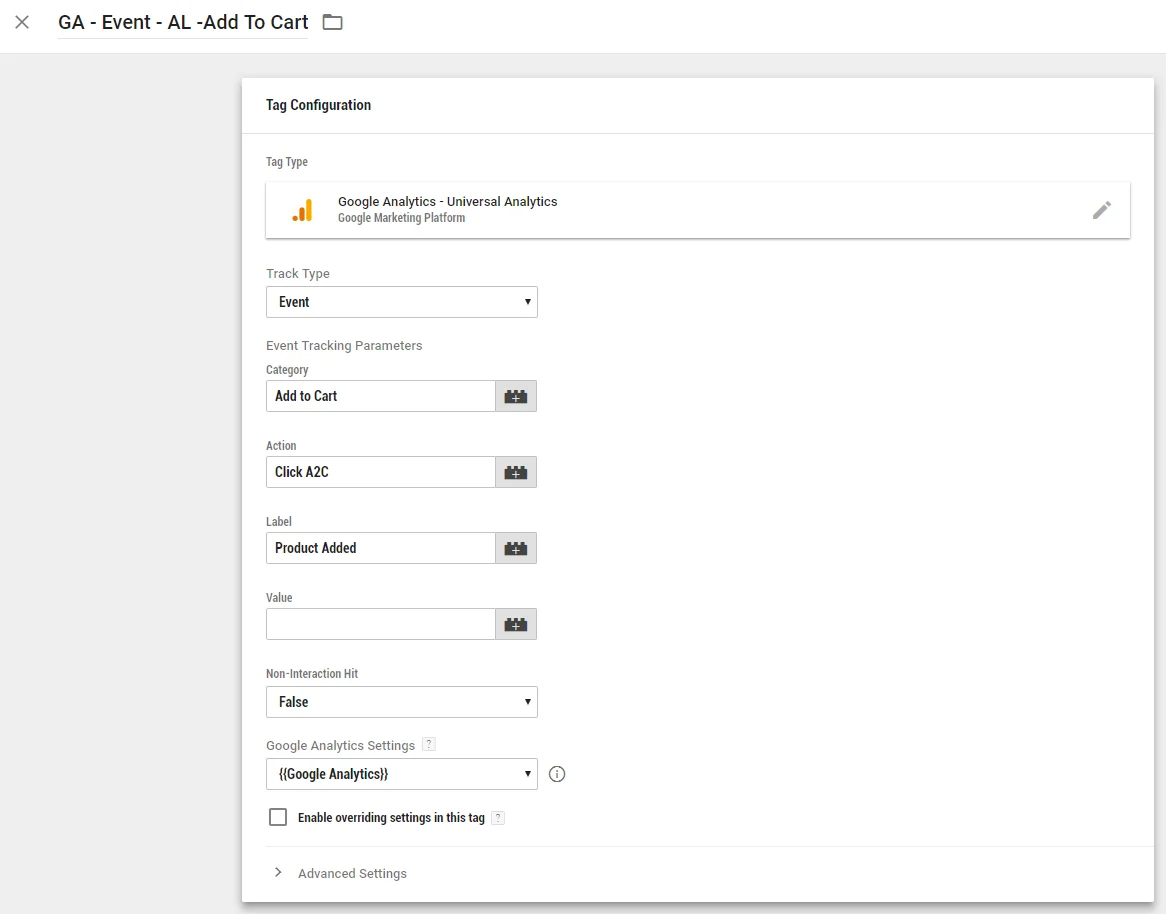

Next, click the Triggering box. You’ll see the trigger you created i.e “Add To Cart Click Trigger”, choose that. Then click save.
Now we want to test this out again but with the new event tag.
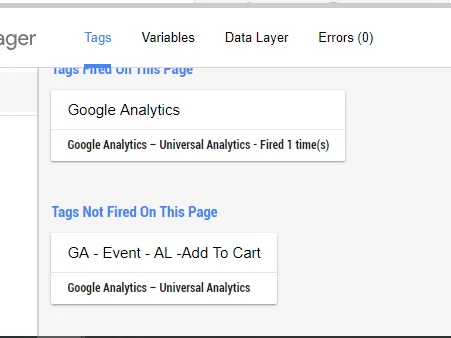
On the workspace screen, you’ll need to click Refresh to refresh the preview mode, then click open the tab with your button and refresh the page. You should see the new tag not fired:

To test your tag, you’ll need to click on your button but remember to hold down the CONTROL/COMMAND key to open a new tab.
The button click should have triggered a gtm.click variable with your new tag: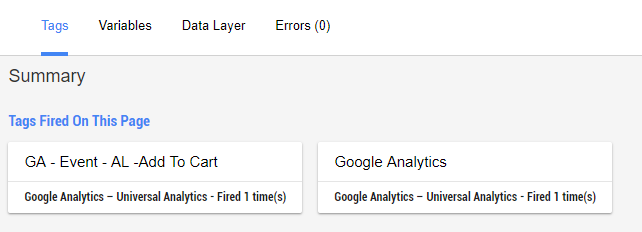

Once you’re happy, go back to your GTM Workspace and submit to publish your new tags.
Tracking Events In Google Analytics.
The final piece of the puzzle is to add an EVENT GOAL in Google Analytics, so you can see the conversion rates between different sources.
Tracking your conversions is key to success, if you need help identifying the right goals and conversions or setting up the best GTM triggers, please contact us or view our SEO services and we’ll be able to help.


